
Table of Contents
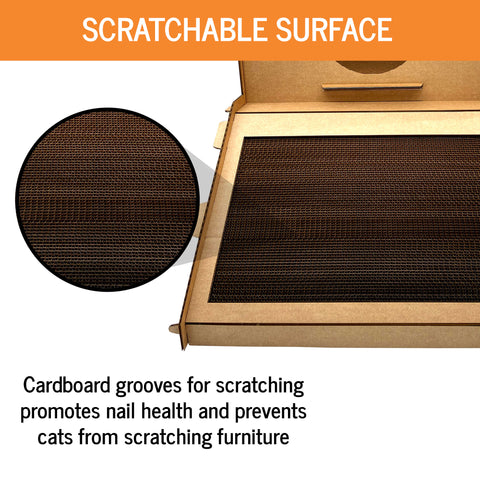
- Why Build a Cardboard Cat Scratcher?
- How to build your DIY Cat Scratcher
- What you’ll need
- Step 1: Measuring and marking where to cut
- Step 2: Cut the cardboard into strips
- Step 3: Line up and organize the strips
- Step 4: Glue the strips on one edge
- Step 5: Rubber band the edge and then glue the middle and other side
- Step 6: Rubberband everything and wait
- Step 7: Decorate with catnip!
Why Build a Cardboard Cat Scratcher?
Cats love to scratch cardboard. And they won't be the only one enjoying it! Furry paws mean that your other furniture and belongings will also stay safe from scratching, because cats are compelled to use scratchers rather than regular surfaces as their personal space for claw maintenance. They'll also keep a close eye on you just in case any tasty treats need active encouragement or coaxing towards them - not unlike some of our own pets at home who know how much we care about them by watching us prepare their food with such enthusiasm before serving up an edible delight!
Cats have been known for being independent creatures since ancient times but when given access to tools like cat scratchers, felines can enjoy life without ever having to worry about damaging the rest of the house. Not only will you make your cat happy, you’ll get rid of some of that extra cardboard you surely have lying around and you’ll have a great time with this DIY project. If your cat does have a habit of eating cardboard, check out our guide and tips for dealing with this behavior first.
How to build your DIY Cat Scratcher
Things you’ll need

You will need a tape measure, rubber bands, some cut resistant gloves, an razor knife, some Gorilla glue, or other super glue, and a pen. And of course you’ll need some corrugated cardboard.
The most important thing to know about these materials is that you have to be very careful with your cat. Cats are small and curious creatures, so make sure the project area is clear of any cats before starting. There's not a ton of information for what sorts of glue are safe for cats. One thing that we can be clear on, though: wet super glue isn't safe! Gorilla glue in particular can expand as it dries and that’s not something you want happening inside your little loved one. So make sure to keep it out of reach from your little feline friend and remember this when you're crafting projects with them in mind.
Learn more about our Cardboard Cat Homes >
Step 1: Measuring and marking where to cut

One of the first things I want to do is make sure that we have our cardboard lined up. The strips that we are going to cut need to be parallel with how this piece of cardboard is positioned right now, and every strip should always look like this!
Let's get to work! The first thing we need do is to mark where to cut on the cardboard. Mark one inch sections all the way down on your piece of cardboard for optimal cat scratching pleasure. Not too tall and not too short - about an inch or so works best (just enough room). And don't worry if you’re markings aren’t perfect. We’re building this for a cat, not for NASA.
And now that you've made your markings, what we're going to do is draw lines using some sort of straight edge. In this case, I just used another piece of cardboard and drew a buncha' lines over it!

Step 2: Cut the cardboard into strips

So now that we have all of these lines marked, it is time to make the cuts. It's a lot of cutting! Please do use knife safety and don't stand directly behind where you're pulling an Exacto Knife because I want nothing more than for you not to slip and cut yourself like me - ouchies! And remember those cute safety gloves? They help us be careful so let's get them on too.

Really check this first strip. This is what it should look like, and we are going to be stacking a lot of these edges together so make sure on your first strip that they all line up correctly! If you don't do the cutting right then you'll have to go back through everything and redo them again which will waste more paper than necessary.
Explore our Cardboard Cat Homes >
Step 3: Line up and organize the strips

I'm super excited to finally have all of the pieces for our new kitty scratcher! I can't wait to see what it looks like when we're done. But first, let's make sure every piece is cut evenly so that they fit together nicely. Now these edges aren’t completely even and because of this some parts are a little wider than others—but don't worry, there's an easy fix! All you need to do is put your cardboard strips on top of a table with one edge against the wall. That'll help everything line up nice and smooth before sewing things down into place...now let's get started by sorting them out from shortest on the left to tallest on the right. By sorting the strips, it’ll look a lot nicer and less bumpy.
Step 4: Glue the strips on one edge

Now that we have everything stacked up, at this point I actually like to put a little rubber band on the opposite side, not here but in the back. That helps keep everything together and now we can start going in and adding dots of glue; you don't need much! Just use one small drop from your bottle because you're gonna be gluing A LOT so it's better if you just go through once than twice or three times.
Step 5: Rubber band the edge and then glue the middle and other side

You can see that we're going to add a rubber band to this side, keep everything super tight, maybe even let it dry for a few minutes first. And then do the exact same thing on the opposite side! Make sure your rubber bands are as tight as possible without breaking or snapping - you want them feeling like they might sometimes (just so long as they don't snap!). You'll be able to tell I put mine just right because it's actually bending my cardboard.
For the opposite side, I like to start from the middle. I like to use two drops of glue: one in the middle and one on the side. Make sure to move quickly. The super glue on the cardboard dries super quickly so you want to make sure everything has a chance to settle in the right place.
Step 6: Rubberband everything and wait

And once you've added a glue layer between every single layer of cardboard,
you can add a bunch of rubber bands, and then you're pretty much done. Now I like to make sure it's completely dry. Let it sit at least 10 minutes and now you're all done.
Step 7: Decorate with catnip!

This task is easy and with just a little catnip you can make your cats happy. I recommend putting the cardboard scratcher on something that won't move around too much, like carpet. Then put some of their catnip on it to attract them over!
If you are interested in other ways you can reuse old moving boxes here is another great article from our friends at Rent.com.
Thank you for reading our guide. I hope you build one yourself and make your cats the happiest little beasts in the world. You may think of better ways to do what we’ve described here. Leave a comment and let us know. We want to help make our kitty cats as happy as possible.

9 comments
SUPERGLUE?!
This site should be shut down because they are literally going to be killing cats for this shiddy advice
Thank you so much for posting this! I have 9 cats currently, because I take in every kitten that I run across, it seems. I just discovered cardboard scratchers, and all the cats love them. But I was a little foolish and bought an extra-large scratcher that doesn’t offer refills. I suppose that’s because they’re hoping you’ll order more and more of the scratchers, but I can’t afford to buy that many scratchers every month. I’ll give this method a try. It’ll be nice to have a use for all the Chewy delivery boxes we go through.
I would think putting all the strips tightly into another shallow box would negate having to use any glue.
Omg I love this! We Have a bunch of boxes… we have 4 cats and they love the scratching boards, but they go through them so fast and it starts adding up quickly. I have 2 boys who would love to help me do this for our cats and im very crafty, so im ganna make a few of these and put on the walls too bec they like to scratch them too. We just bought a new house and they are already scratching up carpet pieces and scratching off paint! Im so thankful I came accrost this bec I have aboit 50 plus bucks worth of scratching things in my cart online… thank you for sharing! ❤
I am so excited to try this. My family has tonnnsss of cardboard and no recycling where we are. Plus my cat adores these things and they get expensive… I also like this kind of mind numbing work. It’s perfect 😻